
Sitecore comes with cool out-of-box field validators that can be applied to each template field, depending on its type. Obviously we can create our custom field validators and here I will explain how to create one.
As a Sitecore developer, when you add a field in a template and want to restrict the input of content editors, applying a business logic or you just want to ensure the inserted value is valid we should definitely use field validators.
First I will explain how to create a class that will be our custom validator and then I will show you how to add it to a field and see a sample how it will work. Let’s begin!
Custom Validator Class
In this case we will create a validation for the length of a General-Link text. Sitecore comes with a Max Length validator inside the Sample folder but it doesn’t evaluate the length of the text inside a General-Link.
We will create a new class called MaxLengthLinkTextValidaor which will extends from StandardValidator. Let’s take a look at the code below to see how it should be implemented:
namespace Sitecore.Custom.Validator
{
    [Serializable]
    public class MaxLengthLinkTextValidaor : StandardValidator
    {
        public override string Name
        {
            get { return "Max length link text validator"; }
        }

        public MaxLengthLinkTextValidaor() {}

        public MaxLengthLinkTextValidaor(SerializationInfo info, StreamingContext context) : base(info, context) { }

        protected override ValidatorResult Evaluate()
        {
            int num = MainUtil.GetInt(base.Parameters["maxlength"], 0);
            if (num <= 0)
            {
                return ValidatorResult.Valid;
            }

            var controlValidationValue = base.ControlValidationValue;
            if (string.IsNullOrWhiteSpace(controlValidationValue) || string.Compare(controlValidationValue, "<link>", StringComparison.InvariantCulture) == 0)
            {
                return ValidatorResult.Valid;
            }

            var xmlValue = new XmlValue(controlValidationValue, "link");
            var attribute = xmlValue.GetAttribute("text");
            if (string.IsNullOrWhiteSpace(attribute))
            {
                return ValidatorResult.Valid;
            }

            if (attribute.Trim().Length <= num)
            {
                return ValidatorResult.Valid;
            }


            this.Text = this.GetText("The maximum length of the field \"{0}\" is {1} characters.", fieldDisplayName);
            return this.GetFailedResult(ValidatorResult.Error);
        }

        protected override ValidatorResult GetMaxValidatorResult()
        {
            return base.GetFailedResult(ValidatorResult.Error);
        }
    }
}
If you have noticed, there is a MaxLegth value that we will be sent from the Sitecore item (explained below).
If we want to also ensure the text is a required field we could edit the attribute condition and use this code instead:
            var fieldDisplayName = new string[] { base.GetFieldDisplayName(), num.ToString() };
            if (string.IsNullOrWhiteSpace(attribute))
            {
                base.Text = base.GetText("Field \"{0}\" must contain a value.", fieldDisplayName);
                return this.GetFailedResult(ValidatorResult.Error);
            }
If a field does not match the condition developed in this validator, the user will see the error text defined in this line:
this.Text = this.GetText("The maximum length of the field \"{0}\" is {1} characters.", fieldDisplayName);
Don’t forget to build your solution in that way Sitecore will recognize our class at the moment we defined an item to point to it.
Custom Validator Item
First, we will need to create a custom validator item under /sitecore/system/Settings/Validation Rules/Field Rules. Let’s name out validator to “Max Length Link Text” and add some Title and Description text. In Data section we will need to point to the class we created previously (Class,Assembly); in this case: Sitecore.Custom.Validator.MaxLengthLinkTextValidator,Sitecore.Custom
Also, we have to add a MaxLength parameter in order to define how many character are we going to accept for the link text.

In the image above, we have set the maximum length of 15 characters. Additionally, we could add another parameter to the validator in order to throw a specif type of error, i.e. &Result=FatalError. Here is the common error types we should apply:
- CriticalError = The user will be warned before saving.
- FatalError = The user cannot save before the error has been resolved.
Now that we’ve defined our custom validator, we need to add it in a General-Link field of a template. In this case, we will create a Sample template with one field called SampleLink.
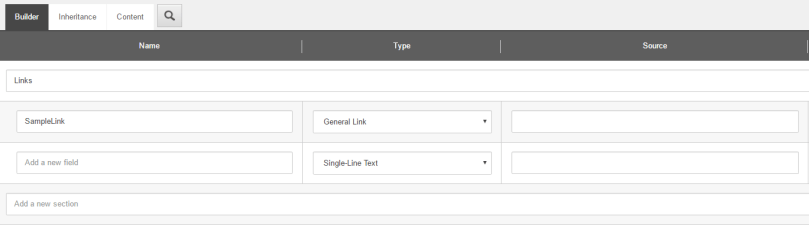
We should navigate to that new field through the tree nodes and add our validator to each validation rule. There are 4 types of rules we should apply to a field: Quick Action Bar, Validate Button, Validator Bar and Workflow (see Validation Rules section).

By doing this, we are setting a validator to the field and it will be evaluated after the user added content to it.
Let’s see a sample; we will add a new item, under Home, based on our template. We will name it “New Sample” and it will have the link field that has the custom validator we recently created.
We will click on “Insert Link”, select the Home item in the tree nodes and write “This is a link” as text. After we clicked on Insert the link will be evaluated and it will display an error message if exists.
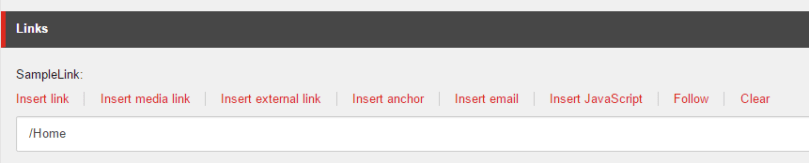
If we see in Raw Values mode, we will see the text contains less than 15 character so our condition passed and it returned a Valid result.

Let’s force the validator to throw an error; edit the current link and set “This is a link wirh error” as text:

If you see in the image above, the link text has more than 15 character so it will throw an error after the content user clicked on Insert.
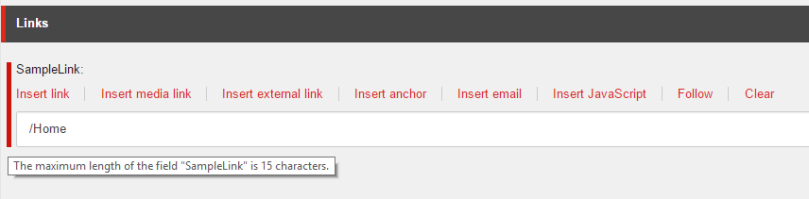
It seems it is working as expected! If we take a look at the raw value it shows the current text value:

… And this is how you create a custom field validator with parameters to prevent content users to add wrong data or to apply business rules on each template fields.
Here was another chapter of my blogs. I will be glad to answer any concern or any suggestion.
Happy Sitecoring 😉
