This step-by-step document will guide you how to migrate content from an old implementation to a newly rebuilt website, which involves besides new functionality and requirements, new templates where you need to migrate content from a deprecated template to new ones.
This tutorial will assume that you already know Sitecore Data Exchange Framework so I won’t go deep into that. Instead, I will start describing the problem I resolved on one of my recent projects. Basically, we need to migrate some field content from an old template to a new template.
Here you will learn the basics of Data Exchange Framework and how you can easily pass content from one template to another. The process includes creating endpoints, data accessors, mapping sets, pipelines, etc.
Pre-requisites
- Sitecore 8.2 (rebuild implementation)
- You can install a clean instance of Sitecore
- Sitecore Data Exchange Framework 1.4 or later (https://dev.sitecore.net/Downloads/Data_Exchange_Framework.aspx)
- Sitecore Provider for Data Exchange
- You can download from the same page you get the framework
Your Sitecore instance should contain the following that from the old site:
- Templates
- Media Library
- Content
From your new site, you only need Templates.
Instructions
Once you’ve installed Sitecore Data Exchange Framework module into your instance, you will see a new option in the /sitecore/system/ called Data Exchange.

Please, follow these steps in order to have a successful content migration:
Tenant
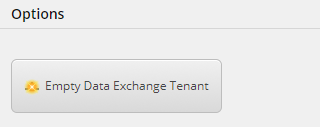
Select the Data Exchange item and you will see in the folder tab an option “Empty Data Exchange Tenant”. Select that option and let’s call it Article.
Expand the new tenant and it should have these items

Endpoints
In order to make this work, the first thing we need to do is create an Endpoint. In this case, we will create a Sitecore endpoint:
- Provider > Sitecore
- Select “Sitecore Item Model Repository Endpoint”

- Let’s call it Local. Since all items will come from a Sitecore repository we only need this endpoint. There are cases when we want to import items from other sources like CVS files, then we will need to install other providers.

Data Access
In order to manage all the fields that we are going to migrate, we need to create Value Accessor Sets per each instance, it means we are going to create 2 sets:
- Source: this item will contain all the fields managed for the old template item.
- Target: it will contain all the fields that we are going to populate with imported data.
- Select Providers > Sitecore
- Select “Sitecore Item Field Value Accessor Set”

Source
First, we will create the Source Article set, so let’s call it “Source Article”. Here you can create “Sitecore Item Field Value Accessor” where you define which field corresponds to the template.
In this sample, we will create 3 value accessor:
- Title (ContentTitle)
- Content
- Image
To achieve this, select the Source Article item and select “Sitecore Item Field Value Accessor”

Once an item is created, the only thing you need to do is set the Field value. Here you will select one of the fields that you will migrate from the old site. For instance, we will migrate ContentTitle that belongs to Custom Titles template item:

Save it and then you can create the rest (i.e.).
- Content: Templates/Site/Fields/Content Text/Content Text/MainText
- Image: Templates/Site/Fields/Images/Images/MainImage
Target
Then, we will create the Target Article set, so let’s call it “Target Article”. This item will contain all fields you want to populate imported data.
In this sample, we will create 3 value accessor:
- Headline
- Content (Main Content)
- Image
Same as we did for the source article we will create three “Sitecore Item Field Value Accessor” items and set the Field value:
- Headline: Templates/Rebuild 2/Foundation/Page Content/_PageContent/Content/Headline
- Content: Templates/Rebuild 2/Foundation/Page Content/_PageContent/Content/Main Content
- Image: Templates/Rebuild 2/Feature/Articles/_Article/Article Data/Article Image
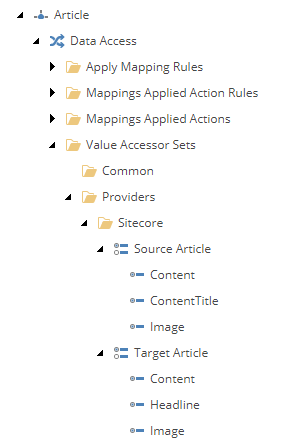
Finally, your Data Access should look like this:
Value Mapping Sets
In order to map fields between old template and the new template we need to create a “Value Mapping Set”.
Select that item, at the bottom of your tenant and select “Value Mapping Set”

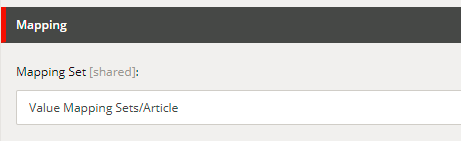
In this case, we can call it Article. Here we can create value mappings where we decide which fields should match.
Usually, you will create one value mapping per two value accessors (1 source and 1 target).
As a sample, we will create a mapping for the title.
- Select your mapping set and create a Value Mapping
- Set as the Source Accessor the value accessor we created for source article:

- Set as the Target Accessor the value accessor we created for target article that matches the ContentTitle, in this case, our new template has Headline

- Save it and repeat the same steps for Content and Image.
Your Mapping Sets should look like this:

Pipelines
This is the most important step on the migration since it will contain the workflow of the process and will determine how items will be imported and how fields will be mapped.
For our content migration process, we will need two main pipeline items and they will contain specific pipeline steps.
First, we will create the main pipeline that will iterate through each item and will be in charge of processing and mapping values.
- Resolve Sitecore Item Pipeline Step
- Here we will set all values to create or update an item.
- Template For New Item is the template we are going to use for the new site, in this case, Article Detail
- Item Name Value Accessor is the field that will be used to create the name of the new item (NOTE: we can create a value accessor for item name)
- Endpoint From is our Local Sitecore repository
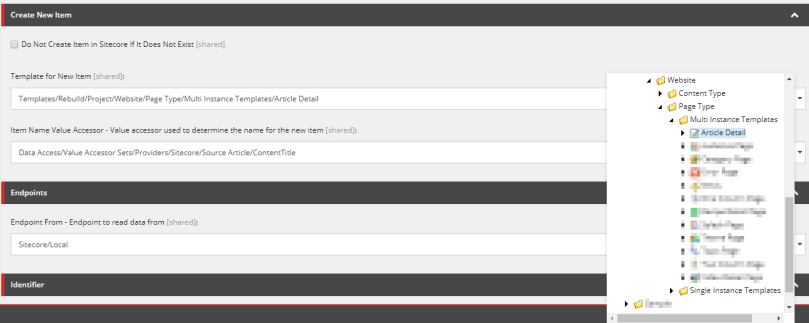
- We need also to set the identifier and the location of the object.
The identifier is a unique value that the pipeline must know to identify if an item was already processed.
Since pipelines run in a specific context we will use the Context Source.
- For the Object Resolution, we are going to use the Context Target

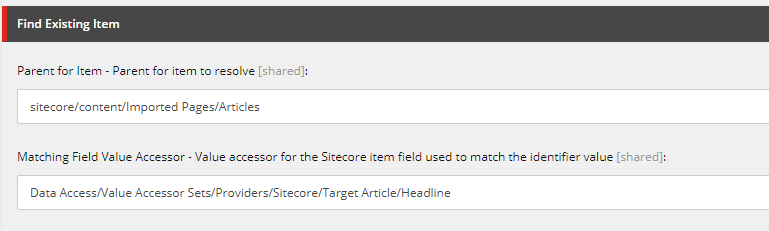
- Finally, we need to set the parent for the item and the matching value accessor in order to let the pipeline know if an item should be created or updated.
- Parent for Item: Here you can create a folder to follow the same structure as the old site, then we can create a package of the whole folder and install it on the new instance.
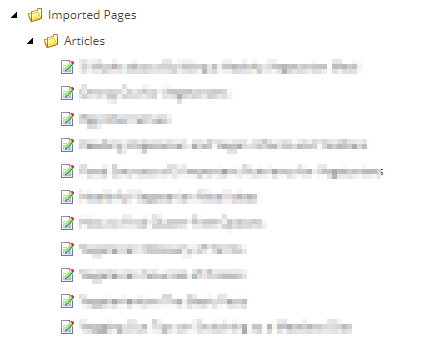
For instance, we created this folder sitecore/content/Imported Pages/Articles to import all the articles from the old site: sitecore/content/Sites/Website/Home/Public Content/Articles - Since we are using ContentTitle (old template) as the item name, and it will be also our headline of our new item, then we can use Headline as our matching field value accessor.
- Parent for Item: Here you can create a folder to follow the same structure as the old site, then we can create a package of the whole folder and install it on the new instance.
- Here we will set all values to create or update an item.
- Apply Mapping Pipeline Step
- In this pipeline we only need to select the Mapping set we created so it will be Article
- Update Sitecore Item Pipeline Step
- Since we are working with only one repository endpoint we just need to select Local as “Endpoint To” field value

- Since we are working with only one repository endpoint we just need to select Local as “Endpoint To” field value
Finally, we will need to create a “Pipeline” so click on the Pipelines item located as children of your tenant and create one, let’s call it “Read Article Items”.
Here we will need two pipelines:
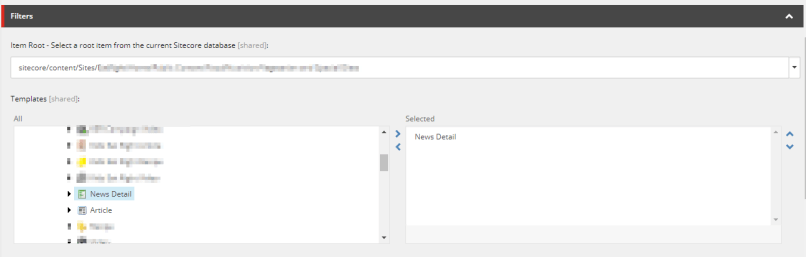
- Read Sitecore Items Pipeline Step
- Select our Local endpoint for the “Endpoint From” field
- Item Root will set the parent item where the pipeline will start to process, in this case, we have selected to start from Sitecore/content/Sites/Website/Home/Public Content/Articles
- Template field will define which templates you want to process at once. Since articles are different from News, for instance, then we don’t need to use both.

- Iterate Data and Run Pipelines Pipeline Step
- This is a pipeline item that will process other pipelines in the order you set in the list. Select Handle Single Row, which is our main pipeline that will process each item.
- Select Pipeline Context Source as Data Location

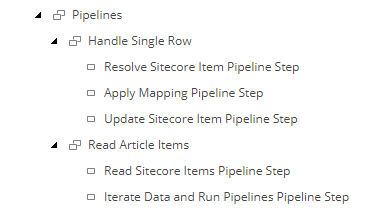
This is how you pipelines structure should look like:
Pipeline Batches
Finally, here is where we create the call to a specific pipeline to be executed.
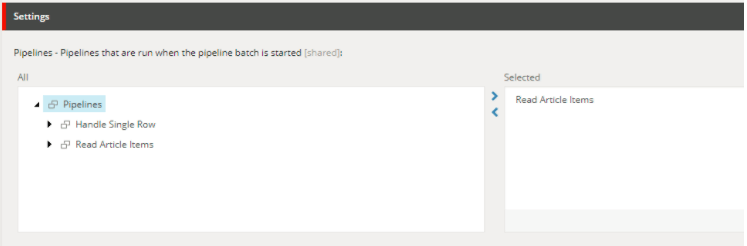
- Create a Pipeline Batch, let’s call it “Import Articles”
- Select the main pipeline you want the migration process to start. In this case, Read Article Items since this pipeline is the one that will process the children of a parent item and will filter by a specific template
- Save and Run the batch
 NOTE: If the “Run Pipeline Batch” is grayed out, it means that the tenant must be enabled. You should select your tenant (/sitecore/system/Data Exchange/Article) and in the Content tab enable it.
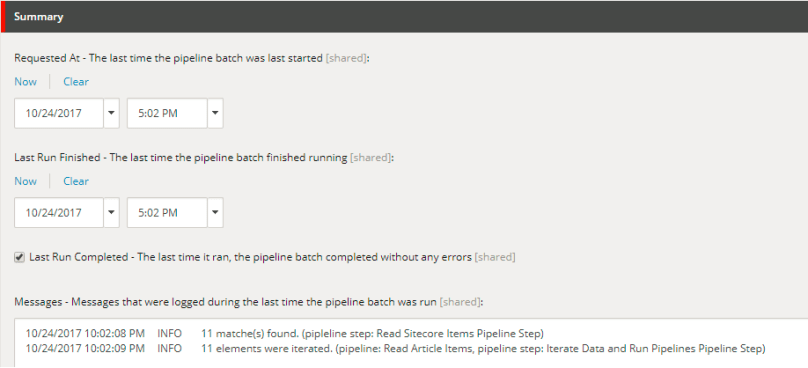
- Once you have executed the batch, you will see some log details on the Summary section
Lastly, you can double check if your articles were imported in the location you specified on the Resolve Sitecore Item Pipeline Step item.
You can quickly migrate news pages with a simple change.
- Go to the Read Sitecore Items Pipeline Step and update the Templates field to use News Detail from the old site
- Go to Resolve Sitecore Item Pipeline Step and change the Template for New Item field to point to News page template from the new implementation

- Run the Batch and you will see some Messages:
10/24/2017 10:08:48 PM INFO 8 matche(s) found. (pipleline step: Read Sitecore Items Pipeline Step)
10/24/2017 10:08:48 PM INFO 8 elements were iterated. (pipeline: Read Article Items, pipeline step: Iterate Data and Run Pipelines Pipeline Step)
- Check the folder where you are importing those templates

I hope this guide was helpful.
Happy Sitecoring 😉
