This guide will help you to enable SSL on Solr so it can run over HTTPS.
1. Download and install JRE or JDK 8.0 or later version
- This will come with the Keytool.exe tool that will help us create the certificate

2. Download Solr 6.6.*-7.2.*
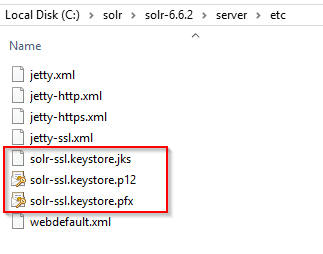
3. In the installation folder, find the etc folder. i.e. C:\solr\solr-6.6.2\server\etc and create a PowerShell script.
- Make sure the that the Keytool.exe is pointing to your local JRE/JDK
param(
	[string]$KeystoreFile = 'solr-ssl.keystore.jks',
	[string]$KeystorePassword = 'secret',
	[string]$SolrDomain = 'localhost',
	[switch]$Clobber
)

$ErrorActionPreference = 'Stop'

### PARAM VALIDATION
if($KeystorePassword -ne 'secret') {
	Write-Error 'The keystore password must be "secret", because Solr apparently ignores the parameter'
}

if((Test-Path $KeystoreFile)) {
	if($Clobber) {
		Write-Host "Removing $KeystoreFile..."
		Remove-Item $KeystoreFile
	} else {
		$KeystorePath = Resolve-Path $KeystoreFile
		Write-Error "Keystore file $KeystorePath already existed. To regenerate it, pass -Clobber."
	}
}

$P12Path = [IO.Path]::ChangeExtension($KeystoreFile, 'p12')
if((Test-Path $P12Path)) {
	if($Clobber) {
		Write-Host "Removing $P12Path..."
		Remove-Item $P12Path
	} else {
		$P12Path = Resolve-Path $P12Path
		Write-Error "Keystore file $P12Path already existed. To regenerate it, pass -Clobber."
	}
}

try {
	$keytool = (Get-Command 'C:\Program Files\Java\jre1.8.0_144\bin\keytool.exe').Source
} catch {
	$keytool = Read-Host "keytool.exe not on path. Enter path to keytool (found in JRE bin folder)"

	if([string]::IsNullOrEmpty($keytool) -or -not (Test-Path $keytool)) {
		Write-Error "Keytool path was invalid."
	}
}

### DOING STUFF

Write-Host ''
Write-Host 'Generating JKS keystore...'
& $keytool -genkeypair -alias solr-ssl -keyalg RSA -keysize 2048 -keypass $KeystorePassword -storepass $KeystorePassword -validity 9999 -keystore $KeystoreFile -ext SAN=DNS:$SolrDomain,IP:127.0.0.1 -dname "CN=$SolrDomain, OU=Organizational Unit, O=Organization, L=Location, ST=State, C=Country"

Write-Host ''
Write-Host 'Generating .p12 to import to Windows...'
& $keytool -importkeystore -srckeystore $KeystoreFile -destkeystore $P12Path -srcstoretype jks -deststoretype pkcs12 -srcstorepass $KeystorePassword -deststorepass $KeystorePassword

Write-Host ''
Write-Host 'Trusting generated SSL certificate...'
$secureStringKeystorePassword = ConvertTo-SecureString -String $KeystorePassword -Force -AsPlainText
$root = Import-PfxCertificate -FilePath $P12Path -Password $secureStringKeystorePassword -CertStoreLocation Cert:\LocalMachine\Root
Write-Host 'SSL certificate is now locally trusted. (added as root CA)'

Write-Host ''
Write-Host '########## NEXT STEPS ##########' -ForegroundColor Green
Write-Host ''
Write-Host '1. Copy your keystore to $SOLR_HOME\server\etc (MUST be here)' -ForegroundColor Green

if(-not $KeystoreFile.EndsWith('solr-ssl.keystore.jks')) {
	Write-Warning 'Your keystore file is not named "solr-ssl.keystore.jks"'
	Write-Warning 'Solr requires this exact name, so make sure to rename it before use.'
}

$KeystorePath = Resolve-Path $KeystoreFile
Write-Host ''
Write-Host '2. Add the following lines to your solr.in.cmd:' -ForegroundColor Green
Write-Host ''
Write-Host "set SOLR_SSL_KEY_STORE=etc/solr-ssl.keystore.jks" -ForegroundColor Yellow
Write-Host "set SOLR_SSL_KEY_STORE_PASSWORD=$KeystorePassword" -ForegroundColor Yellow
Write-Host "set SOLR_SSL_TRUST_STORE=etc/solr-ssl.keystore.jks" -ForegroundColor Yellow
Write-Host "set SOLR_SSL_TRUST_STORE_PASSWORD=$KeystorePassword" -ForegroundColor Yellow
Write-Host ''
Write-Host 'Done!'
4. Open PowerShell and execute the script.
- This script will create the self-signed certificates required to enable SSL
5. In your Solr installation folder, go to the bin folder and open the solr.in.cmd file. Uncomment the settings that relate to SSL (Ctrl + F to find the *_SSL_ entries).

If you want to install Solr as a service you can download the Non-Sucking Service Manager application and follow these instructions.
- Open the command prompt in Administrator mode and navigate where the nssm was installed.
- Execute install command in order to set up a new service

- It will pop out a window where we need to fill some values
- Path: where solr.cmd was installed. C:\solr\solr-6.6.2\bin\solr.cmd
- Startup directory: will be automatically filled in.
- Arguments: start -f -p 9693. Here we specify the port that we are going to use. In this case, we have set 9693 as our port. Make sure the port you use is available.

- Make sure your service is running. Browse to https://localhost:XXXX/solr/ where XXXX is the port number you have set. i.e. https://localhost:9693/solr/ and confirm it’s working.

And that’s it! You have Solr running over HTTPS.
Happy Solring 😉

[…] this quick guide on how to enable SSL on […]
LikeLike